MOST POPULAR
Hi! I'm Niky Foster! Lover of DIY projects, home design, and all sorts of creativity! I started my YouTube channel as a way to document my projects and now I'm here to share my tips, tricks and creative ideas with you!
welcome everyone!
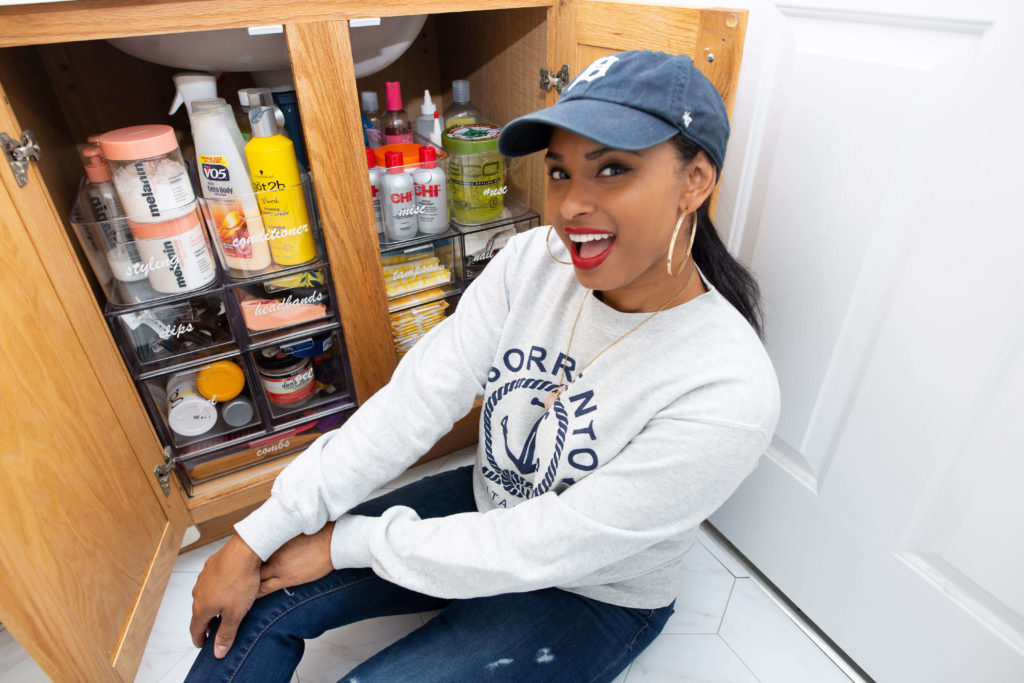
BATHROOM CABINET ORGANIZATION HACK
lifestyle
KIDS BATHROOM $300 DIY MAKEOVER
diy projects
KIDS BEDROOM BOOK NOOK DIY MAKEOVER
diy projects
EXPLORE DIY VIDEOS
JOIN THE DIY FAMILY
Sign up below to receive more DIY inspiration & updates.
CATEGORIES
DIY PROJECTS
ROOM MAKEOVERS
HOME DIY
BULLET JOURNALING
ORGANIZATION
HOME DESIGN
LIFESTYLE
STYLE
DREAMBOX
TRAVEL
FASHION DIYS
FREEBIES
DREAMBOX
Bathroom Cabinet Organization
I don’t know how or when my underneath bathroom cabinet got out of control, but it did. One product after another got lost in the sea of things that were stacked on top of one another, deep down in a bin that I purchased from Home Goods. I wasn’t able to find the stuff I always needed quickly like hair gel, conditioners and sometimes my makeup. Trust me, it did not end there.
I could not take another minute of struggling to find pretty much anything when opening my bathroom cabinet door. It was messy. It was disorganized. And I couldn’t find anything. It got to the point that one day, I just literally decided to do a major bathroom cabinet organization.
Clear Acrylic Containers
For this bathroom cabinet organization project, I knew I wanted clear containers. I also knew I wanted to make custom labels using my Cricut to label everything.
I decided to buy these containers from amazon and organize my cabinet the easy way.
Clear Acrylic Container – 4 1/2 tall
Clear Acrylic Container – 6 3/4 tall
Stackable Clear Organizer Drawer 12″
Open Compartment Plastic Organizer
The open compartment container was a life saver for the tall items like conditioners, hair spray and lotions. It keeps the bathroom cabinet organized, but still maintaining a neatness and consistency with the overall look of the clear acrylic drawers.

Small Bathroom Organization
I sorted everything out. I definitely threw out a bunch of things out that I never used and was not going to use. I don’t like clutter, so I was fine with throwing away unnecessary items.
Next, I put “like” items together. This made it super helpful knowing how much I had of the same things. It really helped with decided on what I actually wanted to keep.
Then I placed everything in the containers neatly.
The last step was using my cricut to make custom labels. If you don’t have a cricut, you can use these pre-made labels.

How to Use the KonMari method
I have to be honest, I kind of took a short cut when I used the Marie Kondo teachings that I learned in her netflix series a few years ago.
On her website she goes over all the steps of using the KonMari method. If you want to use her exact method visit her website. This is just a personal take on what worked for me.
The first step is commit to tidying up. I did that.
The second step is imagining your ideal lifestyle. I did not really do this. I knew I wanted to use clear acrylic containers, but I did not apply it to my whole lifestyle.
The third step is to finish discarding first. I definitely did this.
The fourth step is to tidy by category, not by location. Ok so, this is something I swear by. Even before binge watching Marie Kondo tidy everyone’s house, the need to pile all “like” items in one location always made sense to me. I love the way she goes into detail about how to do it and why.
The fifth step is to follow the right order. I’m guilty. I didn’t do this. I used her method only for my bathroom cabinet. In the KonMari method, you’re supposed to start with clothes, then sentimental items, then eventually go through your house until its all tidy. My closet is still a work in progress. Clothes are the hardest thing to get rid of for me and I guess this is why Marie Kondo made this step one.
The sixth step is to ask if it sparked joy. This was an easy one for me because once I organized my bathroom cabinet, I was able to see everything that I needed. It felt good to declutter all of my hair supplies, feminine products and makeup and have them neatly in one place. So yes, it all sparked joy!

I did not take step by step pics so, if you’re more of a visual person, this video breaks down my full bathroom cabinet organization method. It was quick, easy and you’ll love it.

[…] like items together to see how much you have one one thing. I actually did this method for my bathroom cabinet organization. I also tossed anything I that […]